Tuesday, 25 November 2014

A Step by Step Guide to painting WW1 Naval models

The finished model. For this guide I chose the 
GHQ 1/2400 GWG8 "Moltke Class" model. 


STEP 1: OVERVIEW
The excitement of opening a new package.

Indexing the content and cleaning up any flash.


STEP 2: GLUING & PRIMING
The cleaned model is glued together (no turrets yet),
and glued to the base.

A base coat of matte black is applied.


STEP 3: PAINTING THE HULL
I always try to find some color pictures on google of 
the ship I¨m about to do, just to get the nuances right. I've found a certain 
scale of gray, that seems to fit very well with the German WW1 naval gray.


STEP 4: PAINTING WOOD & RUSTY METAL
Working my way around the model on any wood bits,
 like life boats and rusty metal like anchor chains.

The model after steps 1-4


STEP 5: PAINTING THE DECK
The deck is extremely important. Its what gamers will mostly see, 
and the first thing you'll notice when looking at the model. 
So I want to get details crisp and work with a very light beige nuance,
that goes well with the darker wooden color and the grey.

When painting the deck, I leave a little black around all the details.
This will help enhance the effect of the wash applied later.

Results so far, and the deck is now ready for a wash.

I'm using a light brown wash working my way around 
all the little details, and turret bases as well as the anchor chains.

I've favored GW's "Gryphonne Sepia" wash for the job.

The model after step 5.


STEP 6: HIGHLIGHTING THE HULL
Using a lighter nuance of grey, I trace all the edges
and sharp lines on the hull.

A little extra focus has been laid on tracing the hull edge 
next to the light beige color of the deck. Again I try 
to keep a little black between the two.


STEP 7: HIGHLIGHTING WOODEN & RUST DETAILS
Using a fine brush and lighter brown nuance, I carefully
dot on the paint to give the desired depth.

The model after highlighting.


STEP 8: HIGHLIGHTING THE DECK
Using a creamy beige, I trace the deck's edge towards the
hulls' edge - if I slip onto the little black line between, I repair afterwards.


The model after steps 6-7.


STEP 8: LIFE BOATS
I've seen some old colored post cards where the German 
navy uses white life boats, so that's the color I'll stick with here.

OK, life boats done.


STEP 9: FURTHER RUST EFFECTS
Ships on the salty high seas did get rusty, and to simulate this I apply a
light coat of the brown wash around the anchors and also 
on some of the porthole windows.


STEP 10: COMMAND BRIDGE AND SIGNALS
I'm assuming that the command bridge would have some fancy shiny wooden floor.
It might not be entirely historical, but looks great next to the gray and beige, so...

Ships used light signals and signal flags to communicate.
I'm applying a light blue to help the signal lamps stand out. 
(If you like these kind of details, GHQ have it all included on the model, impressive)

The model after steps 8-10.
In the back the colors used for the command bridge
and signal lights.


STEP 11: ADDING THE KRUPP GUNS
What is a German warship without it's Krupp jewels?
Base coat of black is added after gluing them on.
Notice that when one turret will overlap another, I apply 
them step by step.

The turrets get a base coat of gray and highlighting.
I'm using the same colors as for the hull.


STEP 12: AREAL IDENTIFICATION MARKINGS
I've seen a lot of BW areal photos of the Hochseeflotte,
and they all suggest that the German turrets were painted black
on the roof, while the forward and aft turret had a white circle painted.
This was for easy areal identification by compatriots. 

The last gun is applied and highlighting is done.


STEP 13: THE FUNNELS
These were coal driven steam ships, and coal is black and dirty.
So, I use a little extra time adding details like a light drybrushing of black
to simulate some wear and tear. 

The model after step 11-13.


STEP 14: PAINTING WATER
I'm using the Vallejo 898 Dark Sea Blue.
Not thinning the paint, I apply it in thick 
lines at an angle to the boat. Building carefully
down the side of the hull, to give the effect of the water 
pushed aside as the ship steams through it.

Another view at how the water is build 
with waves using at thick paint.

The stern's push through the water creates a big front wave. 
I'm creating this by applying an extra thick layer
of paint right at the front extending out to each side.

The finished effect.


STEP 15: HIGHLIGHTING WATER
I'm tracing up the now dried waves created 
by the thick initial layer of VMC 898 paint.
For this I'm using a mix of VMC 898 and light grey.

Twirling and dotting out the paint on the wave tops,
and this is the end result.


STEP 16: WAVE TOPS & FOAM
A thick white paint is used, and dotted on with a 0/5 brush.
At the stern I'm dotting some white up the Hull, to create
that wave breaking splash effect of sea foam.

I trace out the former highlighted areas, dotting in some white.

The propeller splash is also added.

The result after steps 14-16.


STEP 17: RIGGING
Using a piece of black sewing thread,
I carefully tie a knot around the rear mast.
This will allow me to fasten an Imperial German flag later.

I do a second knot, and tighten it to make sure she stays put.

Using a small pair of scissors, I cut away any
surplus thread.

Using a sewing needle I dot some super glue 
onto the back of the turret.

Using the back of my scalpel, I gentle press the 
thread down on the glue dot.

Same procedure for the forward mast.
This rigging will be for signal flags.

Glue is dotted on, again using the tip of a sewing needle.

The scalpel is used to press down the thread on the glue.

Excess thread is cut away using the scissors. 

The result after step 17.

Another view at the rigging.


STEP 18: FLAGS
This is actually an idea I got from my friend Jesper.
Using a simple marker tape to make flags.

Cutting out a little piece using the scalpel 
and my daughters fancy ruler :0)

I carefully form the tape bit as a "V".

I hang the "V" upside down on the rigging.

I pinch the two sides of the "V" together to 
form a small flag.

Using the scissors I cut the flag to the desired size.
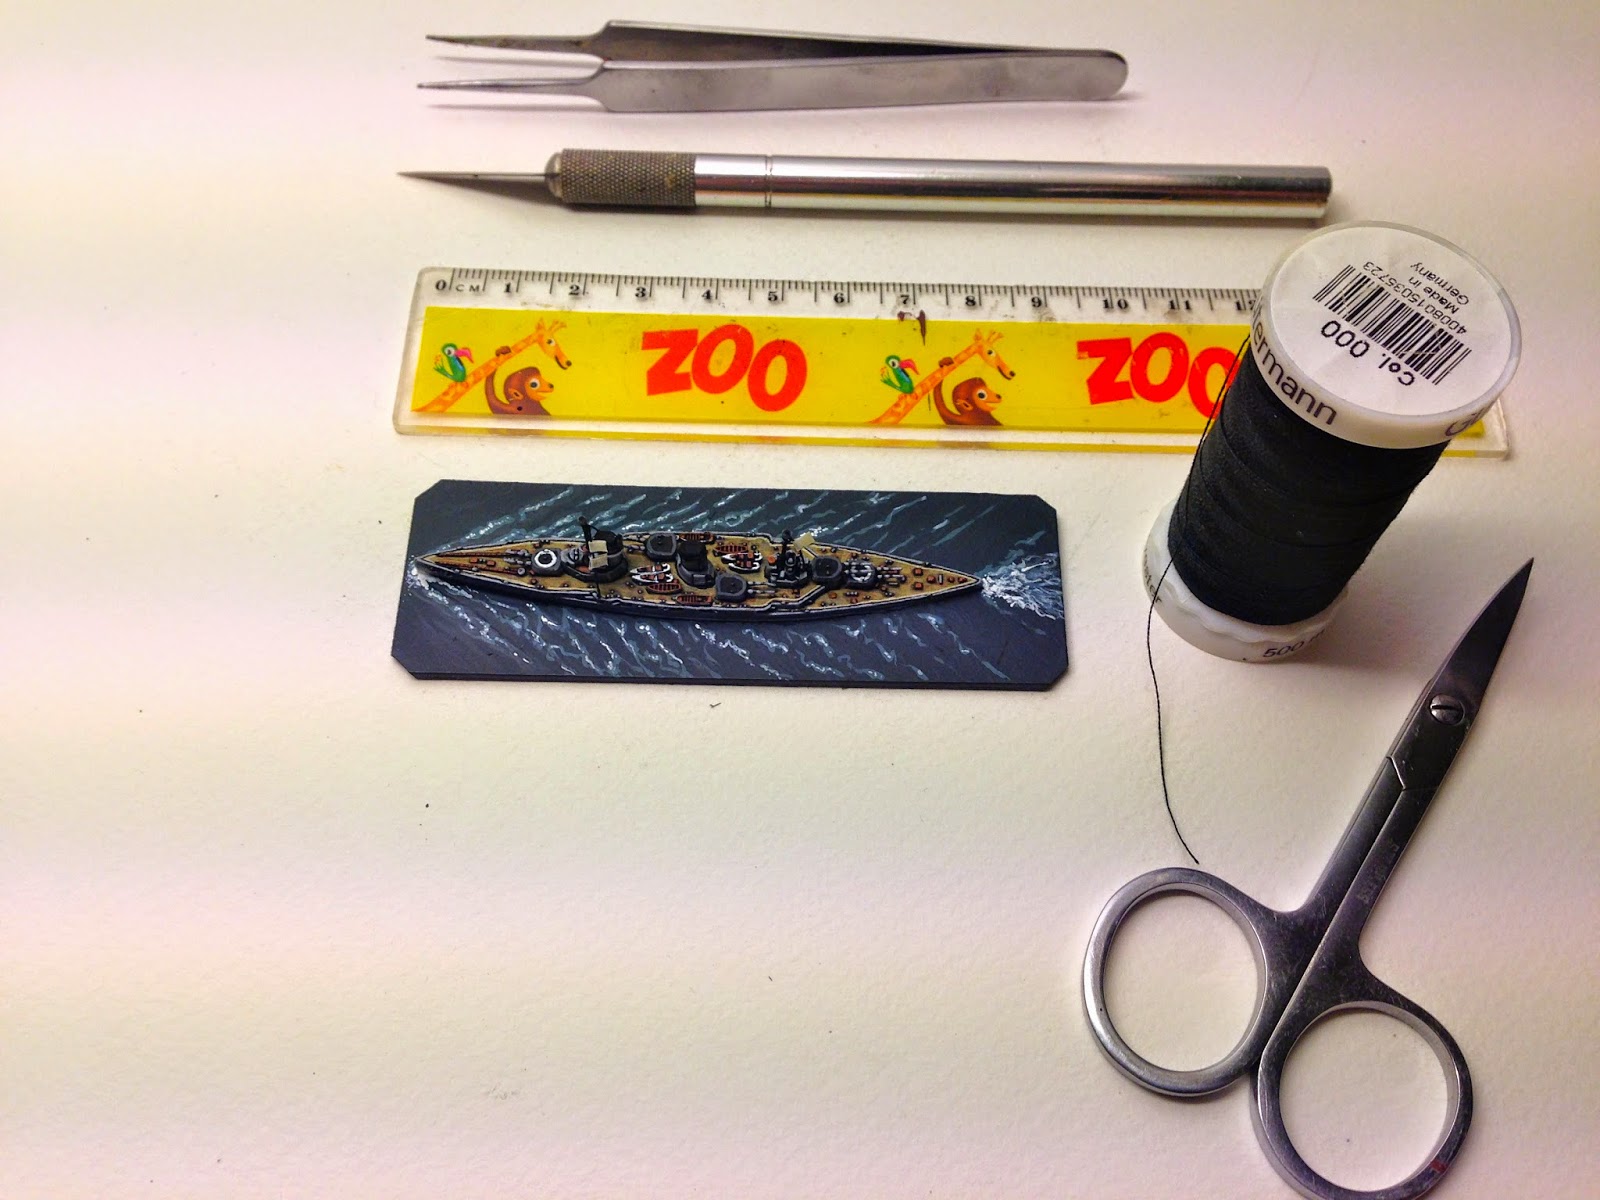
My "Rigging Kit".

Two signal flags are added to the forward rigging.

The tape flags are painted in desired colors.

The finished result after step 18.
I have no idea what the signal flags mean, but they look the part.
Imperial German flag is painted up in the rear mast.


STEP 19: A GLOSSY COATING FOR THE WATER
I'm using a basic acrylic glossy coat to get the water 
shiny and clear. I apply a thick initial coating, again moving the
brush away from the ship at an angle, to simulate the shape of waves.
After the initial coating has dried up, I apply a second coating.

The result after step 19.
The green blue sea color gets really deep and realistic 
when the glossy coating is applied.


STEP 20: NAMING YOUR BABY
The old girl needs a name, right?
So - I created some name tags in InDesign
using Imperial German/Royal Navy flags.
Also, I couldn't resist using a gothic letter font
for the German names. Its all about adding that period spice.


STEP 21: STEAMING OUT OF WILHEMSHAVEN
The finished result.
On her maiden voyage to my gaming table!

Rear shot.

Front shot.

On the prowl for something to aim her guns at!

THANK YOU ALL FOR YOUR SUPPORT AND INTEREST IN MY WW1 NAVAL PROJECT.
HOPE THIS GUIDE WAS USEFUL.

CHEERS,
SÖREN


Wednesday, 19 November 2014

Jellicoe’s flagship: HMS Iron Duke – the Battle of Jutland 1916

GHQ's 1/2400 version of the HMS Iron Duke.

Time to once again rewind the clock to the afternoon of May 31st, 1916 by taking a closer look at HMS Iron Duke, the powerful flagship of Admiral Sir John Jellicoe, commander of the British Grand Fleet at the Battle of Jutland.

"The watchdog of our Empire" - Admiral Jellicoe.

Given the immense task of defending Britain’s naval supremacy against the formidable Imperial German navy, Admiral Jellicoe was under no small amount of pressure. He was, like Winston Churchill put it, “The only man on either side who could loose the war in an afternoon”.

BW picture of the Iron Duke, as she looked during the war.

If the Royal Navy and the Grand Fleet were to suffer a big defeat, the Imperial German Navy and the vast German Army was enough to pose a real threat to Britain itself. Thus the odds were sky high for Jellicoe at Jutland, as his task in effect, was to lure the Hochseeflotte, using Beatty’s battle cruisers as bate, into an ambush consisting of the massed firepower of the numerical superior British Grand Fleet, under circumstances where he could premeditate and control the risks.

The model have been name tagged, 
and is ready to see action on the table.
The bottom left flag on the tag is Jellicoe's actual admiral flag.

The HMS Iron Duke arrived to the Battle of Jutland at the head of the British main fleet, steaming out from Scapa Flow to spring the trap, so costly prepared by Beatty, on the Hochseeflotte. As Jellicoe steamed southwards he had only fragments of intelligence from Beatty, but enough to know that what was coming up from the South, close on Beatty’s tail, was the entire German fleet.

Admiral Sir John Jellicoe.

In the heat of the pursuit and heavy fighting, Beatty had lost contact with the enemy for a moment, and thus could not accurately pin point the location of the approaching enemy fleet to Jellicoe, which left the admiral guessing whether to deploy his column of hard hitting battleships to port or to starboard.

The Iron Duke along with Indefatigable and Lion.
All models are GHQ.

In this instance, Jellicoe had to rely on his many years of expertise and seaman’s gut feeling. He was about to make, what was later described as “ The Royal Navy’s most important tactical decision of the entire 20th Century”.

The floating docks at Portsmouth.
Orion Class "Monarch" ready for launch.

If he swung the wrong way, he would expose the Grand Fleet to the entire fire power of the Hochseeflotte’s Krupp guns, while an opposite turn would put him in the most formidable position, offering the line of British battleships a chance to shoot “broadsides” and the approaching German fleet, only able to fire their forward guns – what is referred to as “Crossing the T”.  Problem was, he didn’t know the position of the enemy, and thus had to make a qualified and very fateful guess.

Coat of Arms for the HMS Iron Duke.
Resemblance to the actual CoA of Wellington.

Jellicoe had character. He had a gentle firmness about him, which still translates to the reader, when going over the historical accounts of the Battle of Jutland. After a few silent moment of contemplation on his command bridge on-board HMS Iron Duke, Jellicoe gave the order deploy the battle line to port side (Left), which would prove to be a most important and decisive, as this indeed put him in a position crossing the enemy’s “T”. Scheer’s fleet was given such an initial pounding, that the Hochseeflotte had to preform as series of complicated extraction manoeuvres, turning about and heading full throttle back the safety of the Jade.

Illustration of the Iron Duke Class ships.

Jellicoe in effect turned the Battle of Jutland, which started out very gloomy for the British with the loss of three mayor ships and about 6.000 lives, into at least a strategic victory that would further confirm British naval supremacy and, likewise important, convincing the Kaiser to be even more cautious in ordering out the Hochseeflotte to sea.

The Grand Fleet steaming ahead.

HMS Iron Duke was names after the famous British general Arthur Wellesley, 1st Duke of Wellington, also know as ”The Iron Duke”, a name he got after entering the stormy world of politics, which resulted in Wellington fitting the windows of his London residence with iron shutters, to prevent the angry mob from smashing them.

HMS Iron Duke was the first battleship to be armed with anti-aircraft guns. A very modern ship with huge firepower, the Iron Duke also gave name to its own class of ships, to which the Benbow, Emperor of India and the Marlborough also adhere.
The Iron Duke rectified many of the errors made in earlier Dreadnought classes, for instance the beam was extended to afford more stability to the 6in guns and protection against underwater damage. However, she was more lightly armoured compared to the contemporary German class, the König. This was a compromise to enable the huge weight of her superior gunnery.


Illustration of the HMS Iron Duke.
Thanks to: www.shipbucket.com

Ship Data: HMS Iron Duke

Laid Down: Jan 1912
Launched: Oct 1912
Completed: March1914
Constructed at: Portsmouth
Displacement: 26.100 tons
Dimensions: 623 x 90 x 32 ft.
Main Guns: 10 x 13.5in 45cal
Armour: 4 – 12 inch belts / 2.5 inch deck / 11 inch Turrets.
Machinery: 4 Shaft Parsons Turbine (29.000 shp = 21knots)
Endurance: 7.780Miles at10knots
Cost: 1.945.000 Pounds in 1912 (ca. 480 million Dollars in todays currency)

Career:
She was the flagship of the Home Fleet in at the outbreak of the war in 1914, and later also became the flagship of Admiral Jellicoe’s Grand Fleet, until she was relieved from the position by Queen Elizabeth in late 1916. She served at Jutland, scoring many hits with her tremendous firepower, but did not herself receive any. After the First World Ward she served in the Mediterranean, the Black Sea and later as part of the Atlantic Fleet. In 1939 she was retired from active service and became a gunnery target at Scapa Flow. After World War Two she was sold off for scrap to the British Iron and Steel Corp. in 1946.


Thank you very much for reading!

Wednesday, 12 November 2014

Lion Rampant - Danish Warhost

A knight of the House of Trolle (with a strong Danish allegiance)
Miniature from Fire-Forge's "Teutonic" box.

My previous visit to Copenhagen and the DFFcon gaming convention was a much cherished chance to finally game with the Scanian War collection I've been building for some 8 or 9 months, but apart from being the apex of expectations the weekend abroad also opened my eyes to new and uncharted rules and periods. 

Lion Rampant.
The best skirmish rules I've played to date.

Michael and Jonas from our local gaming club here in Stockholm both contributed in the development of an exciting new set of skirmish rules, Lion Rampant, published by renown Osprey. After the fate of Scania had been thoroughly decided, Michael changed the table terrain setup, and offered me and my uncle a chance to roll some dice and test these new rules using some of Michael's extensive medieval collection.

Foot soldiers serving the house of Trolle.
Miniatures from Fire-Forge's Foot Sergeants.

Lion Rampant was a real eye-opener to me. It's really the best and smoothest running skirmish rules I've tried so far. Needless to say, the encouraging gaming experience at the convention had us talking on the train back to Stockholm, brain storming on ideas for how to string together an overall narrative, linking single skirmishes together. 

Bardings, knights and lances.
What more can you wish for as a miniatures painter?

Together with experienced gamer Jesper, we decided to use a Swedish Medieval conflict called "Håtunaleken"from 1306 as our source of inspiration. The reason is that this conflict between feudal lords later became a board game - similar in styles and setup with the PC game "Defender of the Crown". So, using the board game map complete with factions, territories, castles and cities and with the actual historical narrative, we had the framework for an interesting club project. All each player had to do, was to each pick a feudal family, and start painting. Using Michael's experience we decided to start off with a simple 12 point army, which is still enough to give you 2-4 units on the table.

Each noble family in the Håtunaleken conflict will have their own activation card.
Here is the one I threw together for the Trolle family.

As the Danes generally found it hard to leave the Swedes to their own during the Medieval period, and there was plenty of Danish interference in this conflict too, I had no shortage of red-and-white noble families to choose from. However, one Dano-Swedish noble family was special to me - the Trolle family.

Herlufsholm Boarding School.
 Næstved, Denmark.

The Trolle heraldry clearly part of the historical heritage of the boarding school. 


Having spent part of my high-school studies at the Herlufsholm Boarding School, founded 1565 by Herluf Trolle, and situated in an amazing old historic estate, I found it my natural calling to field the eye-catching heraldry of the Trolle family - a beheaded troll carrying its own head.

Only really ludomaniac knights carry their own Chess board into battle.

My warhost will contain a mix of knights, some solid foot soldiers and a small prowling gang of skirmishers. A good mix of punch, movement and firepower to soften the enemy. Painting is frenetic, as I plan to lead my host to it's first conquest in just a few weeks time.
I leave you here with the results so far.

Thank you very much for reading!


Wednesday, 5 November 2014

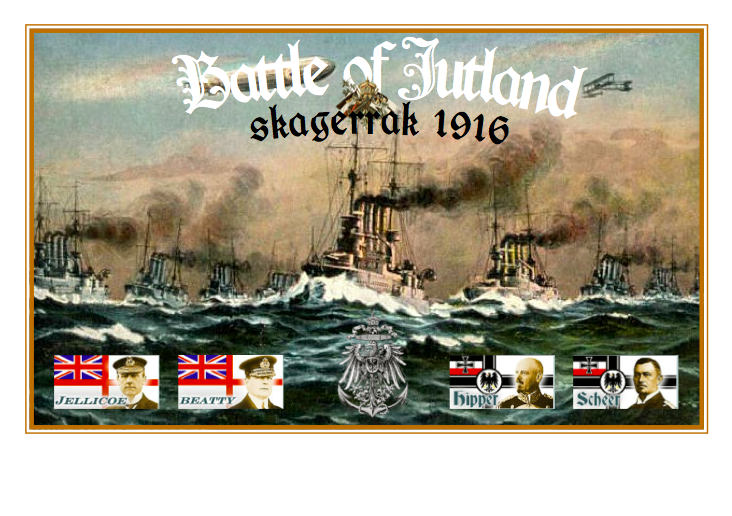
The Battle of Jutland or “Skagerrakschlacht” – 1916


The time has come to indulge my fascination for big Dreadnoughts and Imperial Navies in the form of the single largest battleship confrontation ever - the Battle of Jutland, or as the Germans call it: Skagerrakschlacht.

The GHQ GWG14 Kaiser-Class, painted as Friedrich der Große.

Fought on the 31 May – 1 June in 1916 between the numerically superior British Grand Fleet under Admiral Jellicoe and the technologically advanced Imperial German Hochseeflotte under Admiral Scheer, the Battle of Jutland was the climax of the British and German naval arms race. 

Tirpitz - the Father of the Hochseeflotte.

This race for naval supremacy was initiated some 10 years earlier and driven by the British doctrine of having a fleet greater than the two biggest competing powers at any given time, and the German aspirations for further respect in the league of Empires, by adding a first class navy to bolster the nations military strength, owning also what was perhaps the finest land-army of the period. 

First Sea Lord, Sir John "Jacky" Fisher.
The man behind the Dreadnought.

The creators of these iconic navies were for the British Sir. John Fisher (the man behind the Dreadnought), and for the German Empire, the renowned Admiral Tirpitz.

Added a little name tag with the original 
Kriegsmarine flag and indication of ship class (BB for Battleship).

When ascending to the role of First Sea Lord, John “Jacky” Fisher described the British navy as a series of ships “that could neither fight nor run away”. When he retired in 1910, Britain had spawned the Dreadnought and possessed the World’s largest navy.

A German Battleships gives a broadside.
The Battle of Jutland 1916.

Meanwhile in Germany, Tirpitz and the navy enthusiastic Kaiser drove the ambitious Flottenpolitik forward, clearing ever larger budgets for new, bigger, faster and better ship-classes for the Kriegsmarine.

The Battle of Jutland map overview.

Born and raised in Jutland with family ties to the fishing industry on the west coast, the battle of Jutland has always held a special allure over me. The same could be said for GHQ, a miniatures producer which wonderful WW1 naval models spellbound me since I first set eyes on their crisp and detailed sculpting.

A Kaiser-Class battleship.

So, armed with my first purchase from GHQ, I opted to start off the collection with the German Flagship, the Kaiser-Class Battleship, Friedrich der Große.

A shot from the side. 
Note the little German Kriegsmarine flag from the rear mast.
Made from bending a small piece of tape around the rigging.

Ship Data: Friedrich der Große
Laid Down: 26 Jan 1910
Launched: 10 June 1911
Completed: Oct 1912
Constructed at: The Vulkan Wharf in Hamburg
Displacement: 24.380 tons
Dimensions: 564 x 95 x 27 ft.
Main Guns: 10 x 12in 50cal
Armour: 7 – 13 inch belts / 3 inch deck / 11,75 inch Turrets.
Machinery: 3 Shaft Parsons Turbine (31.000 shp = 21knots)
Endurance: 9.500Miles at 10knots
Cost: 2 Mio Pounds in 1912 (ca. 270 million Dollars in todays currency)


S.M.S Friedrich der Große as Line Drawing.

Career:
Friedrich der Große was the Flagship of the Commaner-in-Chief of the Hochseeflotte from 1914-16. At the Battle of Jutland she was part of 3rd Battle Squadron arriving to the battle with the main fleet under Admiral Scheer. She avoided any hits, but scored several on the British Warspite, forcing a withdrawal of the huge Queen Elizabeth-Class ship.

Signal flags added to the side rigging, again made from tape.
Its worth noting the German markings on the turrets, for clear air identification.

Friedrich der Große was retired as Flagship when the Baden came into service in late 1916. She was later surrendered in 1918, and scuttled by her crew at Scapa Flow.

Thank you very much for reading!