Wednesday, 3 December 2014

Lion Rampant - Example of a 12 Points Army

6 points worth of Knights.
The hard-hitting but expensive elite of my Lion Rampant Army.
Figures are from Fire-Forge.

Leading up to the launch of our Club Tournament in Lion Rampant I had prepared a 12 point army using the very simple and easy to follow troop descriptions in the rulebook.

I decided, or rather took the expert advise of Medieval Connoisseur Michael "Dalauppror",
 to break down my 12 points into three units. Michael was part of the play-testing group during the development of the rules, so I thought it prudent to listen to his suggestions.

6 Points: 
A unit of 6 Knights. 
Lovely on the attack, but expensive and rather hard to get mobile with an activation of 7+ on a 2d6. However they will add hits to the enemy on 3+ if they get into contact.

4 Points: 
Is be allocated to a 12 man Foot Serjeant unit.
These would be my all-round unit, especially strong when defending.
They are quite mobile as they move on a 5+ on 2d6, so they can be used both to support offensive actions and to quickly fill a hole in the battle line defensively.

2 Points:
 A unit of 6 Bidowers.
These are irregular missile troops, but come with loads of extra stuff like evasive moves and full movement in though terrain. Fragile but mobile and can soften up/irritate the enemy with their long range shooting.

A side view of the bardings.
Additional to the great rules, getting to paint bardings was the real attraction.

As I couldn't find any suitable transfers resembling the Trolle Heraldry,
I decided to approach the barding in free hand.

Inspiration! A few months back I picked up the excellent 3-volume series
on medieval uniforms/weapons illustrated by my favorite illustrator couple, 
Fred & Lilian Funcken!

4 points worth of Foot Serjeants.
The Trolle family historically had estates in both Sweden and Denmark,
so I let loose on the red-white "Dannebrog" color scheme for the shields.

Another plate from the amazing Funcken books!

2 Points were invested in Bidowers.
Irregular skirmishers with a selection of missile weapons.

The Heraldry of the Trolle family - a headless troll.

SO, HOW DID THEY PLAY IN THIER FIRST GAME?

I threw my newly painted 12 point army into action straight away and, well... 
Let's say the overall conclusion is that Knights should not be the spearhead of your initial attack. In the clear light of hindsight they would seem better applied at a later stage, when the enemy has been softened up. But, my nobles gallantly lead the way forward galloping to their death, but first they had to widnes their leader getting slain in a knight-to-knight duel with an opposing commander, who used the "Challange" rule.

As the Knights vaporized quite early in the game, my Foot Serjeants quickly became my core unit. The really neat thing about this rather large but inexpensive unit, is that it can form a shield wall, or "Schiltron", as the rules call it. This means they dramatically increase their defensive value, and can act - as they did for me - as a defensive gathering point when/if you get into trouble.

I used the Bidowers to try and draw the enemy in, which worked all to well unfortunately,
as they ended up taking the brunt of the enemy's missile fire.  However I still think they point for point are a really good and inexpensive way to add diversity and to get something mobile that can really annoy your enemy.

Even though I fought the battle with two other factions as my allies, we all got a sound beating and the Trolle army had to leave the field to the enemy and tend to their wounded leader.

Conclusion: 
Lion Rampant is fast becoming a personal favorite, even for bigger medieval games, because you attack, move and roll using units, but apply casualties and test morale by single figures. Its a really well oiled engine Osprey have released, and it seems very much the perfect set of rule for the Medieval period.

I've already got a HYW project in mind for 2015 with Lion Rampant as the rules of choice.

Thank you very much for reading!

Tuesday, 25 November 2014

A Step by Step Guide to painting WW1 Naval models

The finished model. For this guide I chose the 
GHQ 1/2400 GWG8 "Moltke Class" model. 


STEP 1: OVERVIEW
The excitement of opening a new package.

Indexing the content and cleaning up any flash.


STEP 2: GLUING & PRIMING
The cleaned model is glued together (no turrets yet),
and glued to the base.

A base coat of matte black is applied.


STEP 3: PAINTING THE HULL
I always try to find some color pictures on google of 
the ship I¨m about to do, just to get the nuances right. I've found a certain 
scale of gray, that seems to fit very well with the German WW1 naval gray.


STEP 4: PAINTING WOOD & RUSTY METAL
Working my way around the model on any wood bits,
 like life boats and rusty metal like anchor chains.

The model after steps 1-4


STEP 5: PAINTING THE DECK
The deck is extremely important. Its what gamers will mostly see, 
and the first thing you'll notice when looking at the model. 
So I want to get details crisp and work with a very light beige nuance,
that goes well with the darker wooden color and the grey.

When painting the deck, I leave a little black around all the details.
This will help enhance the effect of the wash applied later.

Results so far, and the deck is now ready for a wash.

I'm using a light brown wash working my way around 
all the little details, and turret bases as well as the anchor chains.

I've favored GW's "Gryphonne Sepia" wash for the job.

The model after step 5.


STEP 6: HIGHLIGHTING THE HULL
Using a lighter nuance of grey, I trace all the edges
and sharp lines on the hull.

A little extra focus has been laid on tracing the hull edge 
next to the light beige color of the deck. Again I try 
to keep a little black between the two.


STEP 7: HIGHLIGHTING WOODEN & RUST DETAILS
Using a fine brush and lighter brown nuance, I carefully
dot on the paint to give the desired depth.

The model after highlighting.


STEP 8: HIGHLIGHTING THE DECK
Using a creamy beige, I trace the deck's edge towards the
hulls' edge - if I slip onto the little black line between, I repair afterwards.


The model after steps 6-7.


STEP 8: LIFE BOATS
I've seen some old colored post cards where the German 
navy uses white life boats, so that's the color I'll stick with here.

OK, life boats done.


STEP 9: FURTHER RUST EFFECTS
Ships on the salty high seas did get rusty, and to simulate this I apply a
light coat of the brown wash around the anchors and also 
on some of the porthole windows.


STEP 10: COMMAND BRIDGE AND SIGNALS
I'm assuming that the command bridge would have some fancy shiny wooden floor.
It might not be entirely historical, but looks great next to the gray and beige, so...

Ships used light signals and signal flags to communicate.
I'm applying a light blue to help the signal lamps stand out. 
(If you like these kind of details, GHQ have it all included on the model, impressive)

The model after steps 8-10.
In the back the colors used for the command bridge
and signal lights.


STEP 11: ADDING THE KRUPP GUNS
What is a German warship without it's Krupp jewels?
Base coat of black is added after gluing them on.
Notice that when one turret will overlap another, I apply 
them step by step.

The turrets get a base coat of gray and highlighting.
I'm using the same colors as for the hull.


STEP 12: AREAL IDENTIFICATION MARKINGS
I've seen a lot of BW areal photos of the Hochseeflotte,
and they all suggest that the German turrets were painted black
on the roof, while the forward and aft turret had a white circle painted.
This was for easy areal identification by compatriots. 

The last gun is applied and highlighting is done.


STEP 13: THE FUNNELS
These were coal driven steam ships, and coal is black and dirty.
So, I use a little extra time adding details like a light drybrushing of black
to simulate some wear and tear. 

The model after step 11-13.


STEP 14: PAINTING WATER
I'm using the Vallejo 898 Dark Sea Blue.
Not thinning the paint, I apply it in thick 
lines at an angle to the boat. Building carefully
down the side of the hull, to give the effect of the water 
pushed aside as the ship steams through it.

Another view at how the water is build 
with waves using at thick paint.

The stern's push through the water creates a big front wave. 
I'm creating this by applying an extra thick layer
of paint right at the front extending out to each side.

The finished effect.


STEP 15: HIGHLIGHTING WATER
I'm tracing up the now dried waves created 
by the thick initial layer of VMC 898 paint.
For this I'm using a mix of VMC 898 and light grey.

Twirling and dotting out the paint on the wave tops,
and this is the end result.


STEP 16: WAVE TOPS & FOAM
A thick white paint is used, and dotted on with a 0/5 brush.
At the stern I'm dotting some white up the Hull, to create
that wave breaking splash effect of sea foam.

I trace out the former highlighted areas, dotting in some white.

The propeller splash is also added.

The result after steps 14-16.


STEP 17: RIGGING
Using a piece of black sewing thread,
I carefully tie a knot around the rear mast.
This will allow me to fasten an Imperial German flag later.

I do a second knot, and tighten it to make sure she stays put.

Using a small pair of scissors, I cut away any
surplus thread.

Using a sewing needle I dot some super glue 
onto the back of the turret.

Using the back of my scalpel, I gentle press the 
thread down on the glue dot.

Same procedure for the forward mast.
This rigging will be for signal flags.

Glue is dotted on, again using the tip of a sewing needle.

The scalpel is used to press down the thread on the glue.

Excess thread is cut away using the scissors. 

The result after step 17.

Another view at the rigging.


STEP 18: FLAGS
This is actually an idea I got from my friend Jesper.
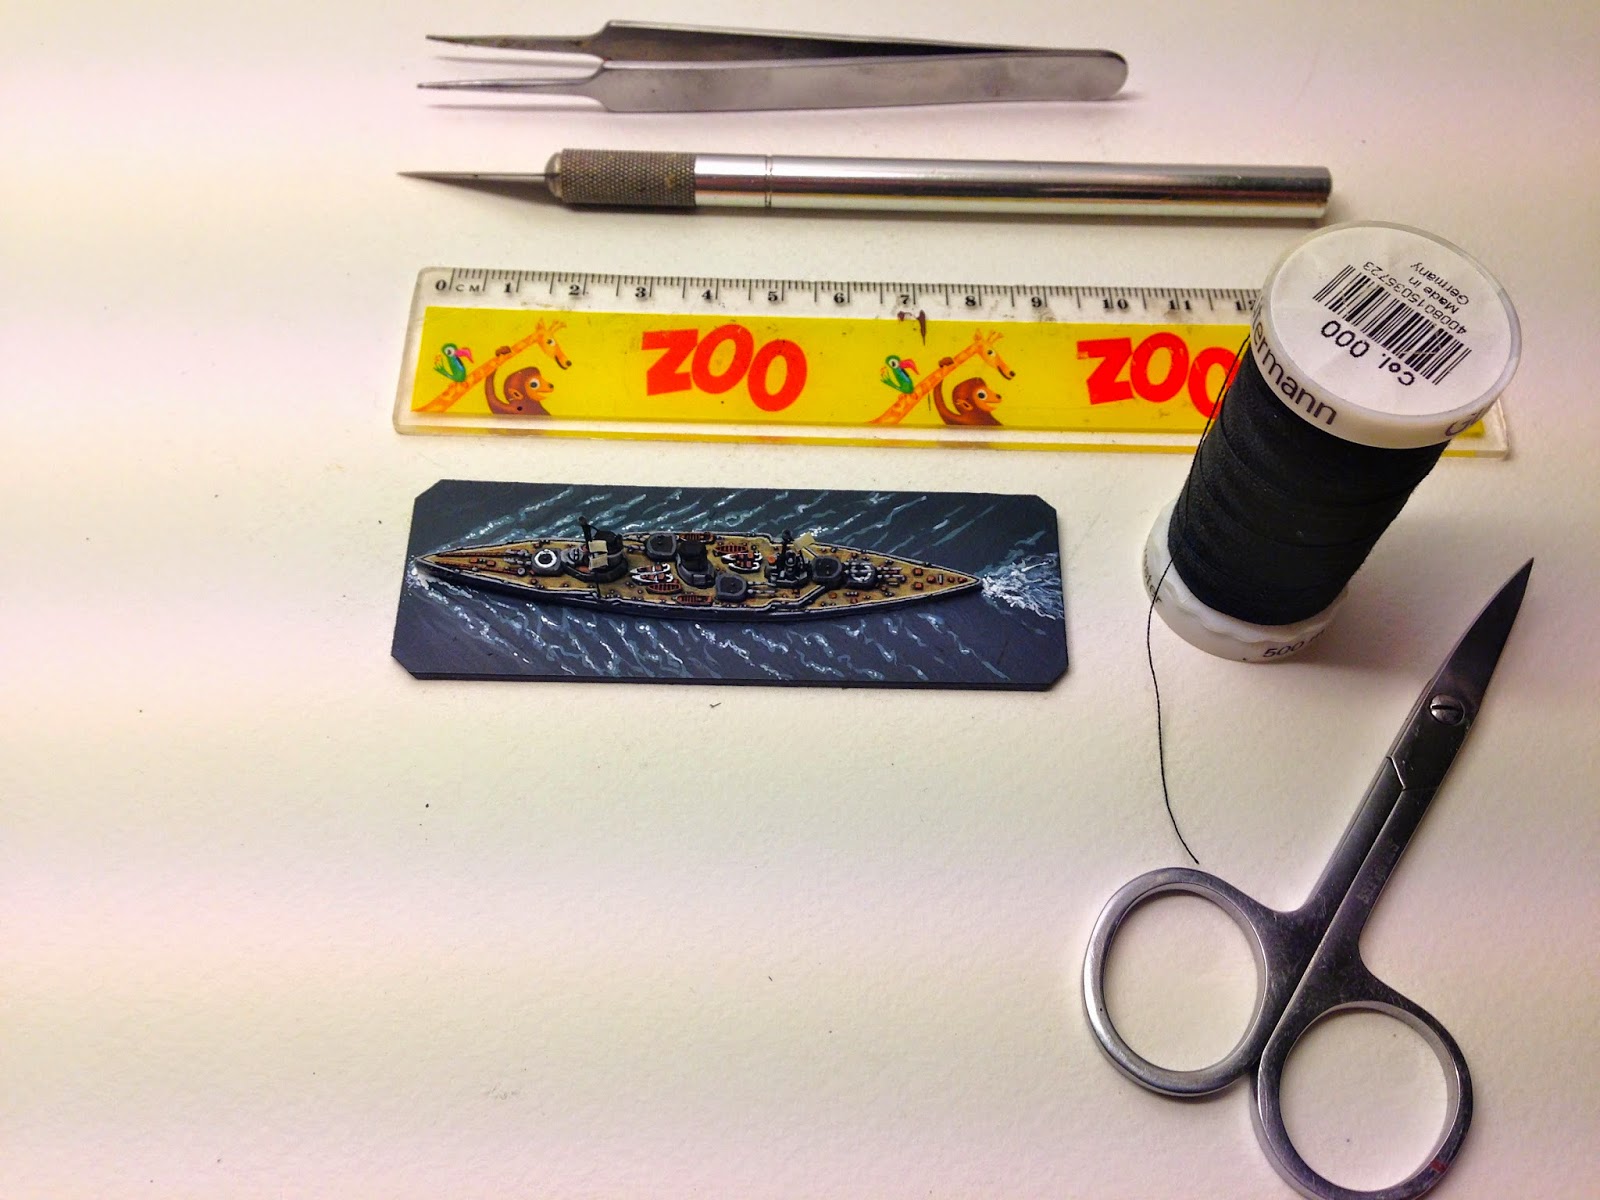
Using a simple marker tape to make flags.

Cutting out a little piece using the scalpel 
and my daughters fancy ruler :0)

I carefully form the tape bit as a "V".

I hang the "V" upside down on the rigging.

I pinch the two sides of the "V" together to 
form a small flag.

Using the scissors I cut the flag to the desired size.

My "Rigging Kit".

Two signal flags are added to the forward rigging.

The tape flags are painted in desired colors.

The finished result after step 18.
I have no idea what the signal flags mean, but they look the part.
Imperial German flag is painted up in the rear mast.


STEP 19: A GLOSSY COATING FOR THE WATER
I'm using a basic acrylic glossy coat to get the water 
shiny and clear. I apply a thick initial coating, again moving the
brush away from the ship at an angle, to simulate the shape of waves.
After the initial coating has dried up, I apply a second coating.

The result after step 19.
The green blue sea color gets really deep and realistic 
when the glossy coating is applied.


STEP 20: NAMING YOUR BABY
The old girl needs a name, right?
So - I created some name tags in InDesign
using Imperial German/Royal Navy flags.
Also, I couldn't resist using a gothic letter font
for the German names. Its all about adding that period spice.


STEP 21: STEAMING OUT OF WILHEMSHAVEN
The finished result.
On her maiden voyage to my gaming table!

Rear shot.

Front shot.

On the prowl for something to aim her guns at!

THANK YOU ALL FOR YOUR SUPPORT AND INTEREST IN MY WW1 NAVAL PROJECT.
HOPE THIS GUIDE WAS USEFUL.

CHEERS,
SÖREN